Friday morning was spent with Fred at Bedient Organs. He showed me how to replace a leather pouch on an electropneumatic chest. There had been some water damage in the main manual chest resulting in some very stiff and crinkly leather. After the demonstration, I replaced the remaining 5 pouches myself. I guess I had it in my mind that these pouches and the EP action itself is this mystical component that shouldn't be messed with unless absolutely necessary- doing so may open a Pandora's Box of problems. That may be true and I may have just enough knowledge now to be extremely dangerous. However, it really wasn't all that difficult. Part of me is asking "That wasn't so bad- maybe I should have replaced ALL the pouches and basically have a brand-new windchest from the start." I just need to remind myself that although I want to do things right the first time, I really need to start practicing. If I can even get 5-10 years out of these pouches I will be satisfied. Then there's the cost associated- I need to save up some cash for other parts including the Dulciana celeste rank and another windchest...
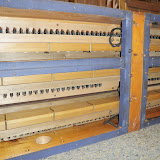
 I forgot to grab my camera when going to Bedient, so there are no pictures of actually laying the pouches. The album here shows carefully removing the old pouch with an Exacto knife, gently removing the spring, and then thoroughly removing all the old leather and fish glue from the pouch board.
At Bedient I did the following:
1) Fred prepared a dowel that precisely fit through the spring hole. He drilled a hole in the end of it to receive the pin on the underside of the pouch.2) Glue a leather nut to the pin on the underside of the pouch. The nut should be thin enough to leave a little nub of the pin sticking through. The nut should be small enough across that the spring will seat snugly around it.
3) Make certain the dowel will fit through the spring hole. Remove magnets if necessary.
4) Apply a thin layer of fish glue around the pouch well. Do not use so much that it oozes out onto the pouch board or especially into the well. Fish glue is used because it holds well, but can be cleanly removed if necessary for future repairs (hopefully not for 50 years!). It also cleans up easily with water.
5) Put the dowel through the spring hole in the pouch board with the little hole toward the pouch. Using the dowel as a centering guide, place the nub of the pouch pin in the dowel hole.
6) Lower the dowel and pouch until the pouch sits level with the pouch board. Gently press the pouch to the glue. Wait a moment for the glue to set and gently press down on the pallet until it rests on the bottom of the well.
7) Smooth out any wrinkles in the pouch and press the edge of the pouch firmly to the pouch board.
After 24 hours, use the dowel to raise the pouch as high as it will go without stretching it. Make sure the pallet will rise high enough to seat against the toe board. Very gently run your finger around the edge of the well. Feel for stiff places where glue may have oozed out onto the leather. Use your finger to break up the glue without stretching the pouch. Sharp bits of glue can wear a hole in the leather causing early failure. Gently replace the spring through its hole. Make sure the spring seats around the leather nut. Use the fish glue to replace the paper disc that holds the spring in place.